How to Integrate Electronic Signature Software with Your CRM, HR, and Accounting Tools
Electronic signature tools have become essential for teams that want to move faster, reduce administrative work, and keep documents organized across multiple departments. The real efficiency boost happens only when your e-signature platform is fully integrated with the systems you rely on such as your CRM, HR platform, and accounting software. Integrating these tools means connecting your e-signature platform with each system so documents, data, and approvals flow between them automatically and stay synced without any extra manual steps.
When everything operates as one connected workflow, you remove manual uploads, prevent data entry errors, shorten approval cycles, and ensure every agreement lands in the right place automatically. This level of integration allows your sales, HR, and finance teams to work in a more predictable and efficient way, with fewer delays and far less repetitive work.
Whether you are a startup preparing for rapid growth, an SMB looking for smoother processes, or a scaling team aiming to eliminate workflow bottlenecks, integrating your e-signature software is one of the fastest ways to build a more streamlined and efficient operation.
Key Takeaways:
Integrating e-signature software with your CRM, HR, and accounting tools eliminates manual uploads and data entry, allowing documents and approvals to move automatically.
CRM integrations streamline sales workflows by auto-generating proposals, updating deal stages, and storing signed agreements in the correct records.
HR integrations speed up hiring and onboarding with reusable templates, automated routing, and consistent policy documentation across the entire employee lifecycle.
Accounting integrations improve financial accuracy with faster approvals, synchronized vendor and customer data, and audit-ready storage for every signed document.
Successful integrations require clean data, standardized templates, clear workflow mapping, and regular audits to keep automations reliable as your business scales.
What “True Integration” Really Means
Most businesses think integration means simply connecting two apps. In reality, true integration goes deeper than a basic connection.
Types of Integrations
1. Plug-and-Play Integrations
These are built-in connections already provided by your software. They require little to no setup and allow you to connect your tools in just a few clicks.
2. API Integrations
These are custom connections created using developer endpoints. They offer more flexibility and allow your team to tailor the integration to your exact workflow.
3. Deep Integrations
These create a fully connected workflow with two-way data syncing, automated document movement, real-time updates, and event-based triggers that keep everything in sync across your systems.
Why True Integration Matters
No more switching between tools
Documents stay organized automatically
Data stays consistent across departments
Audits become easier
Workflows run without human intervention
When done correctly, integrating your e-signature software can remove 50–70% of repetitive document work in your business.
Benefits of Integrating E-Signature Software Across Your Tools
Faster sales cycles and closed deals
Zero manual uploads and fewer administrative errors
Better onboarding and hiring experiences
Standardized processes across teams
Automated audit trails
Reduced approval backlogs
Clearer visibility on document status in every department
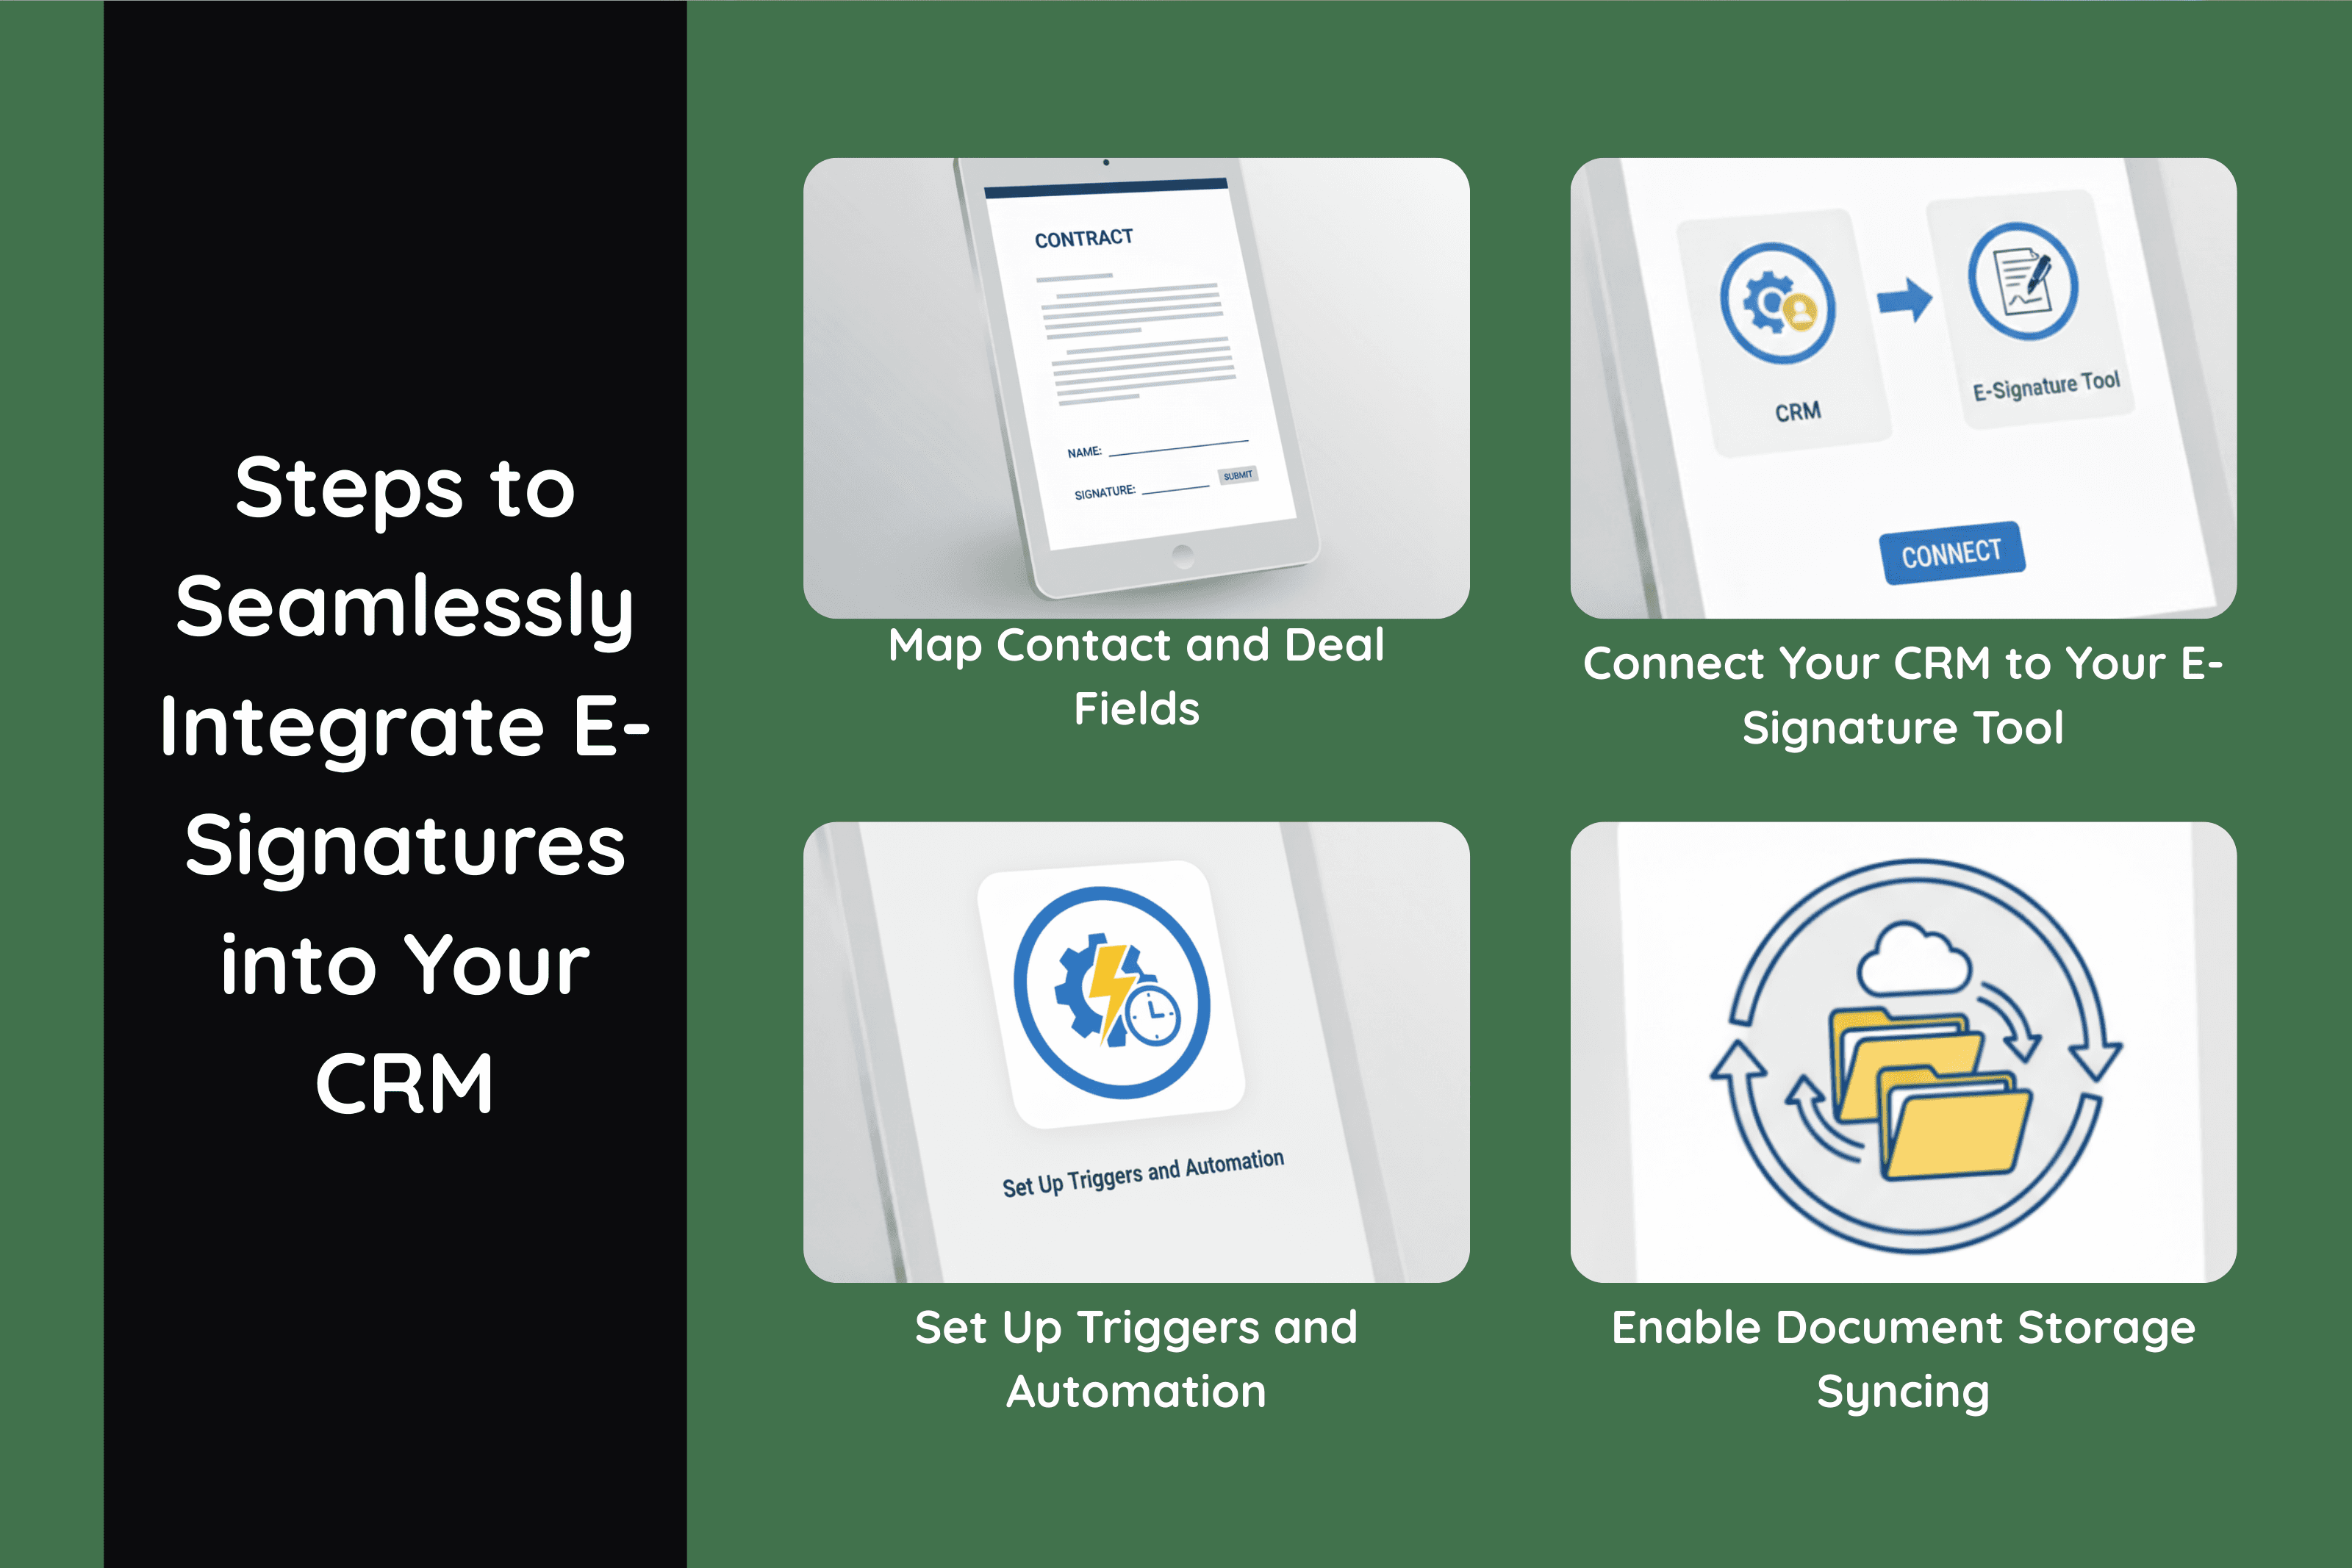
How to Integrate E-Signatures with Your CRM (Step-by-Step)
Integrating your e-signature software with your CRM creates a direct path between the information in your pipeline and the documents your clients need to sign. The process is simple once you set up the right fields, templates, and triggers. Each step below strengthens the connection between the two systems and ensures every document is accurate, trackable, and stored in the right place.
Step 1. Map Contact and Deal Fields
Field mapping ensures that the information stored in your CRM flows directly into your e-signature templates. Instead of typing details manually, the system pulls everything from the correct fields and inserts them into your documents.
Decide which CRM fields should automatically populate your templates, such as:
Company name
Contact details
Pricing information
Deal values
Renewal dates
Mapping these fields reduces preparation time and ensures every contract reflects the exact data stored in your CRM.
Step 2. Connect Your CRM to Your E-Signature Tool
The connection process is usually quick and allows your CRM to communicate with your e-signature platform. Once connected, your team can generate, send, and track contracts without switching between tools.
This setup often includes:
Enabling the integration inside your CRM marketplace
Approving the necessary permissions
Selecting the templates you want to use
Choosing the pipelines or deal stages where the integration will apply
Once connected, documents can be created directly from the CRM, and activity logs will update in real time.
Step 3. Set Up Triggers and Automation
Automation is where the integration becomes truly powerful. Triggers allow your CRM to respond instantly to document activity without anyone manually monitoring the process.
Common triggers include:
Contract Sent
Contract Viewed
Contract Completed
Each trigger can initiate specific actions that keep your deals moving. These actions may include:
Moving a deal to the next stage
Assigning follow-up tasks to the sales rep
Sending automated emails or messaging alerts
Generating an invoice once the agreement is signed
These automated steps ensure that no document sits idle and that every signed agreement moves the pipeline forward without delay.
Step 4. Enable Document Storage Syncing
Once a document is signed, it needs to be stored in the correct record. Storage syncing ensures that every signed file ends up exactly where your team expects to find it.
You can automatically save signed documents to:
The corresponding CRM record
Your cloud storage system
Dedicated deal folders or client folders
This reduces manual filing work and ensures that your team always knows where to locate completed contracts.
Popular CRM Platforms That Support E-Signature Integrations
Most modern CRM platforms include built-in connections to e-signature tools, which makes it easy to automate documents, track signatures, and keep contract records organized. These integrations help sales teams work more efficiently by managing every stage of the contract process inside the same system they already use to manage deals. Examples include Salesforce, HubSpot, Pipedrive, Zoho CRM, Close, Copper, and Freshsales.
Each of these platforms supports templates, triggers, activity tracking, and automated document management to maintain a smooth and consistent workflow from document creation to final signature.
HR Integrations: Speed Up Hiring, Onboarding, and Policy Management
HR teams manage some of the most document-heavy workflows in any organization, including employment contracts, performance evaluations, policy acknowledgments, and a wide range of onboarding forms. Integrating your e-signature platform with your HR software allows these documents to move through each step automatically, reach the right people at the right time, and remain properly organized without extra manual work.
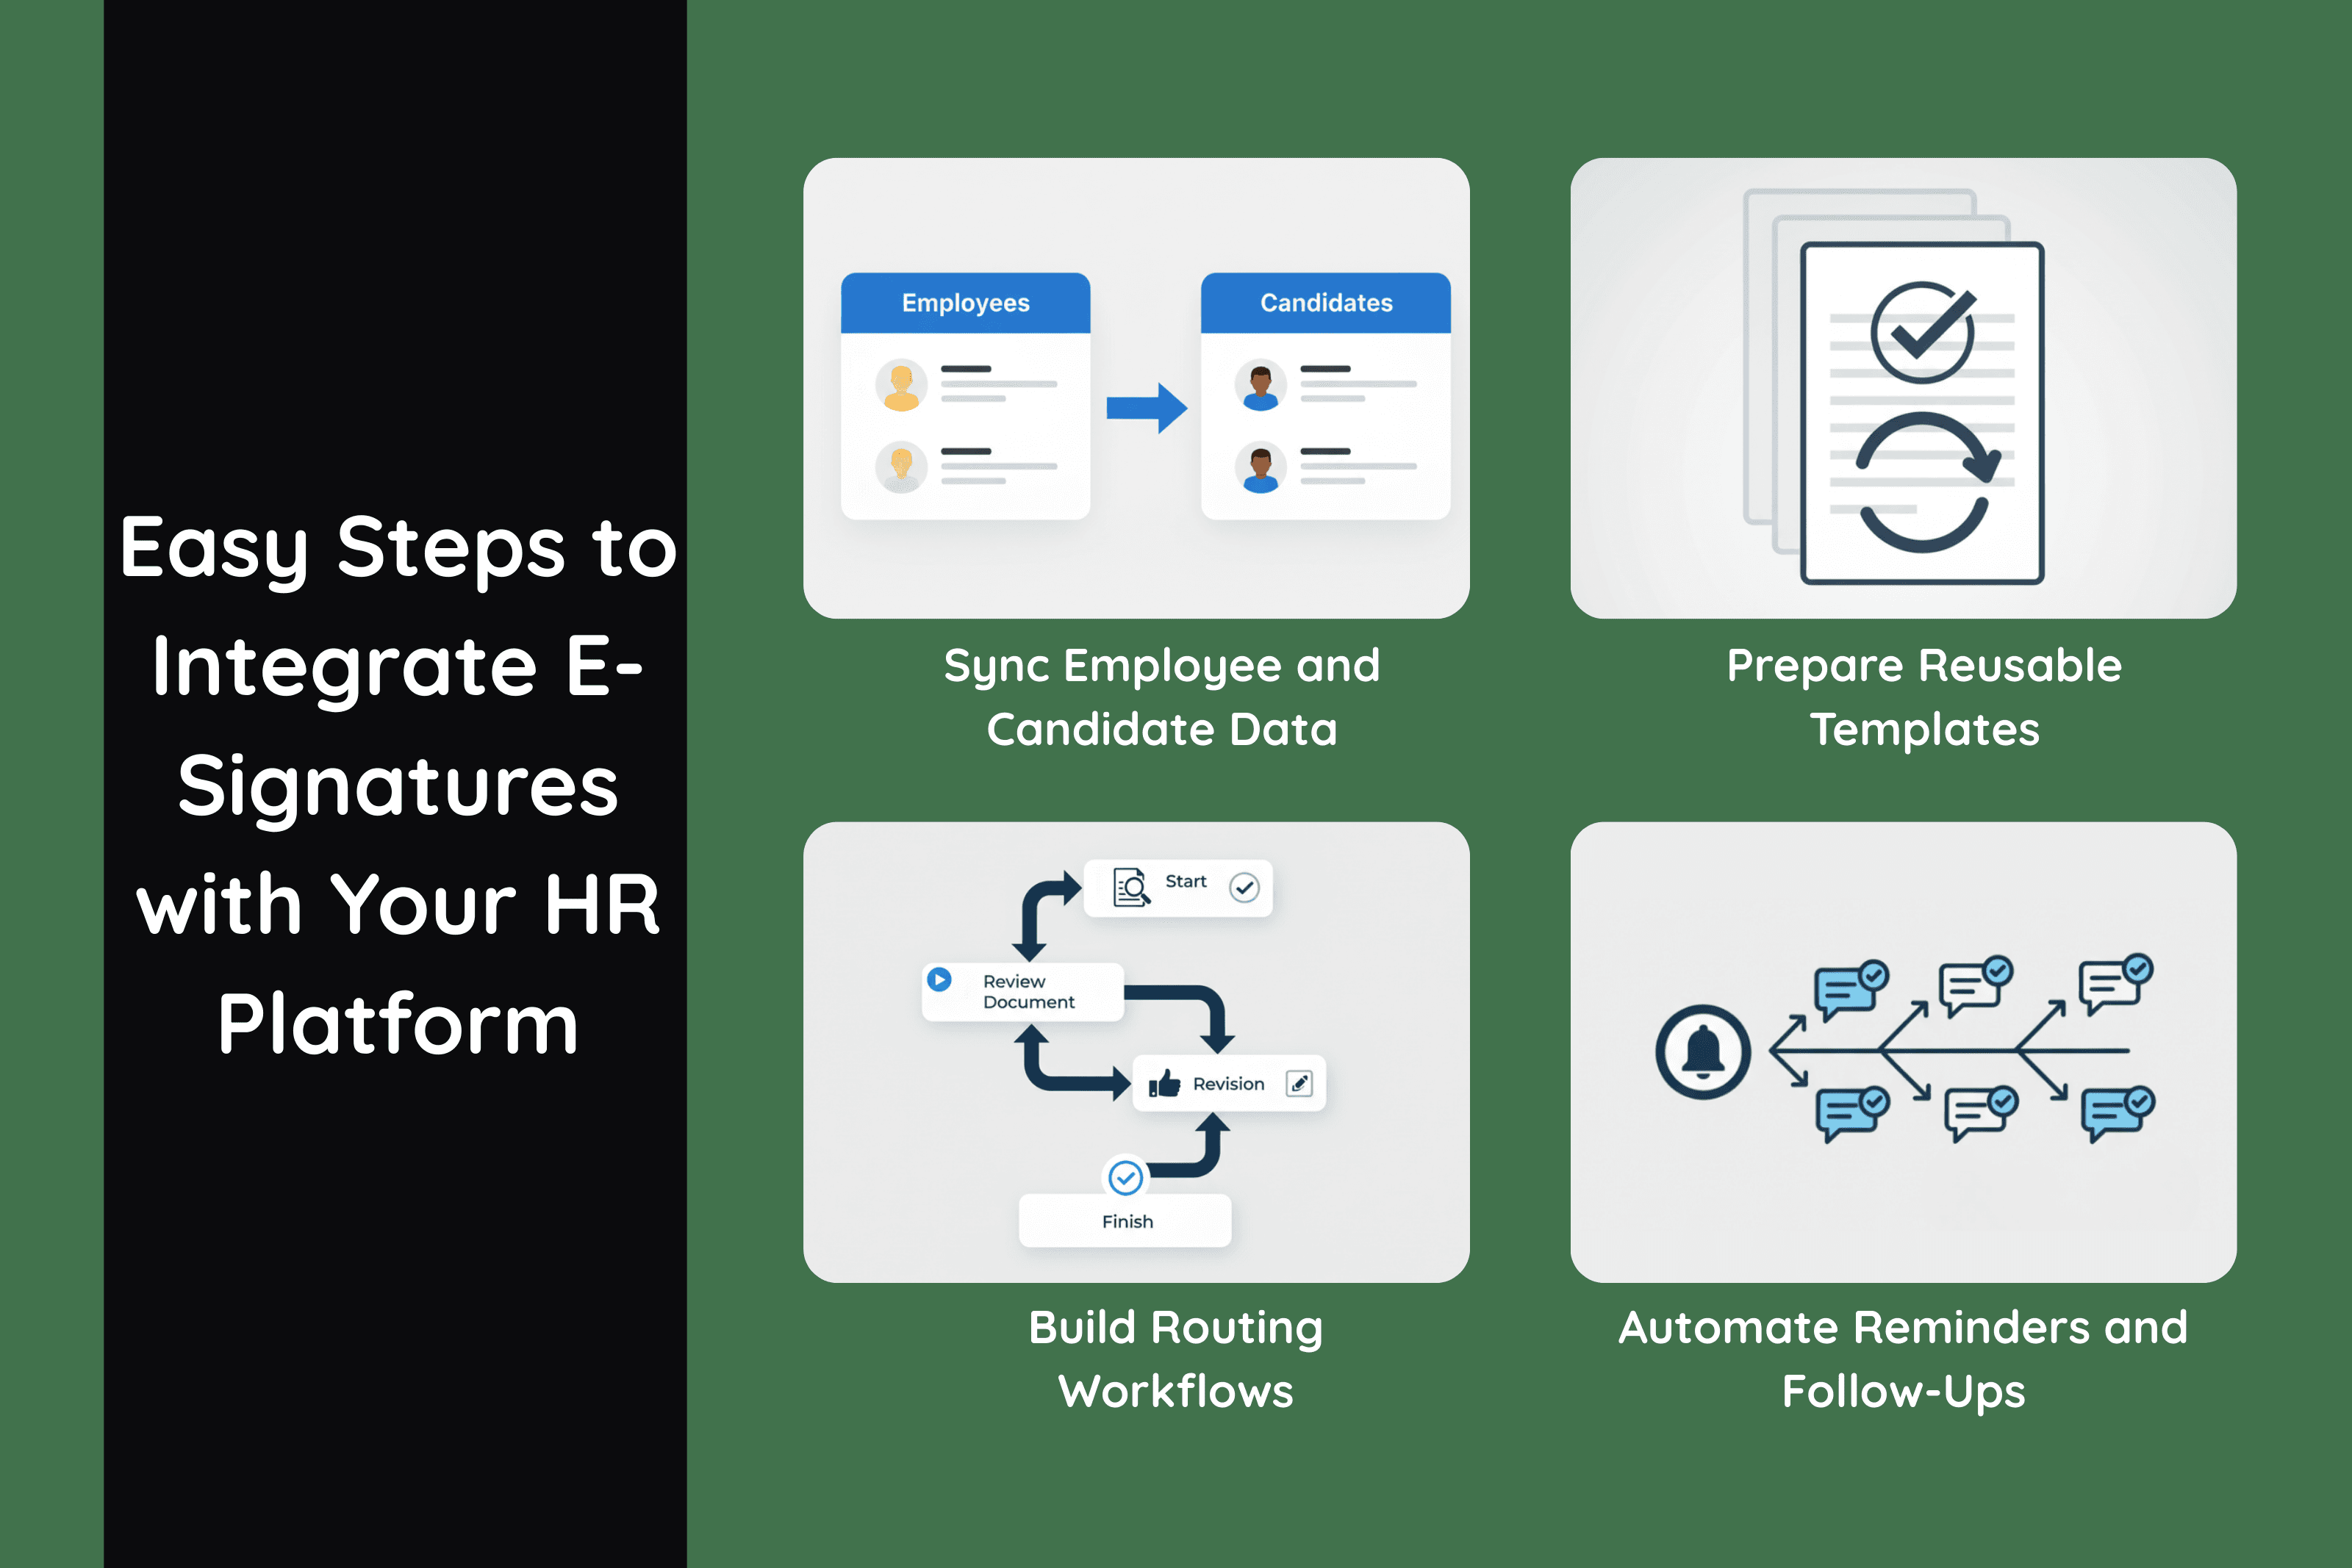
Step-by-Step: How to Integrate E-Signatures With HR Platforms
Integrating your e-signature software with your HR system creates a connected environment where hiring, onboarding, and policy management run automatically. The steps below help you set up a workflow that supports both HR teams and employees with greater speed and accuracy.
Step 1. Sync Employee and Candidate Data
Your HR platform stores important information about applicants and employees. Syncing this data with your e-signature tool ensures documents are always filled with accurate and up-to-date details.
Import or map information such as:
Candidate names
Employment details
Job titles
Locations
Departments
This connection removes the need to retype information and guarantees that each document reflects the correct role, location, and employment structure.
Step 2. Prepare Reusable Templates
Templates help HR teams create consistent, professional documents without starting from scratch. Once these templates are connected to your e-signature platform, they can be generated automatically whenever HR initiates a workflow.
Examples include:
Offer letters
NDAs
Policy acknowledgments
Onboarding checklists
Compliance forms
Organizing these templates in one place ensures everyone uses the most current and approved versions.
Step 3. Build Routing Workflows
HR documents often require multiple signatures in a specific order. Setting clear routing rules ensures each document flows to the correct person and progresses automatically once each step is completed.
Define signing order for documents such as:
Hiring manager
HR
Candidate
This structure makes it easy to track who has signed, who still needs to sign, and where a document sits in the approval chain.
Step 4. Automate Reminders and Follow-Ups
HR teams no longer need to chase signatures manually when the integration is configured correctly. Your system can send automated notifications that guide candidates and employees through each step.
Send automated reminders such as:
Gentle reminders
Compliance notices
Mandatory policy acknowledgements
These follow-ups keep the process moving, reduce delays, and ensure all documents are returned on time.
Popular HR Platforms That Integrate with E-Signatures
Many HR platforms offer built-in connections to e-signature tools, which makes it easy for teams to manage hiring, onboarding, and policy documentation in one place. Popular systems such as BambooHR, Workday, Gusto, Rippling, ADP, Namely, and Zenefits support automated document creation, routing, tracking, and storage. These integrations allow HR teams to send forms instantly, collect signatures without delays, and keep every completed document organized within each employee’s profile, creating a seamless experience across the entire employee lifecycle.
Accounting Integrations: Smooth Approvals, Billing, and Audits
Finance teams operate in an environment where accuracy, traceability, and consistency are essential. Integrating your e-signature platform with your accounting software strengthens these standards by ensuring that every approval, invoice, and agreement moves through a controlled and automated process. This connection reduces manual work, improves financial visibility, and supports stronger compliance during audits and reviews.
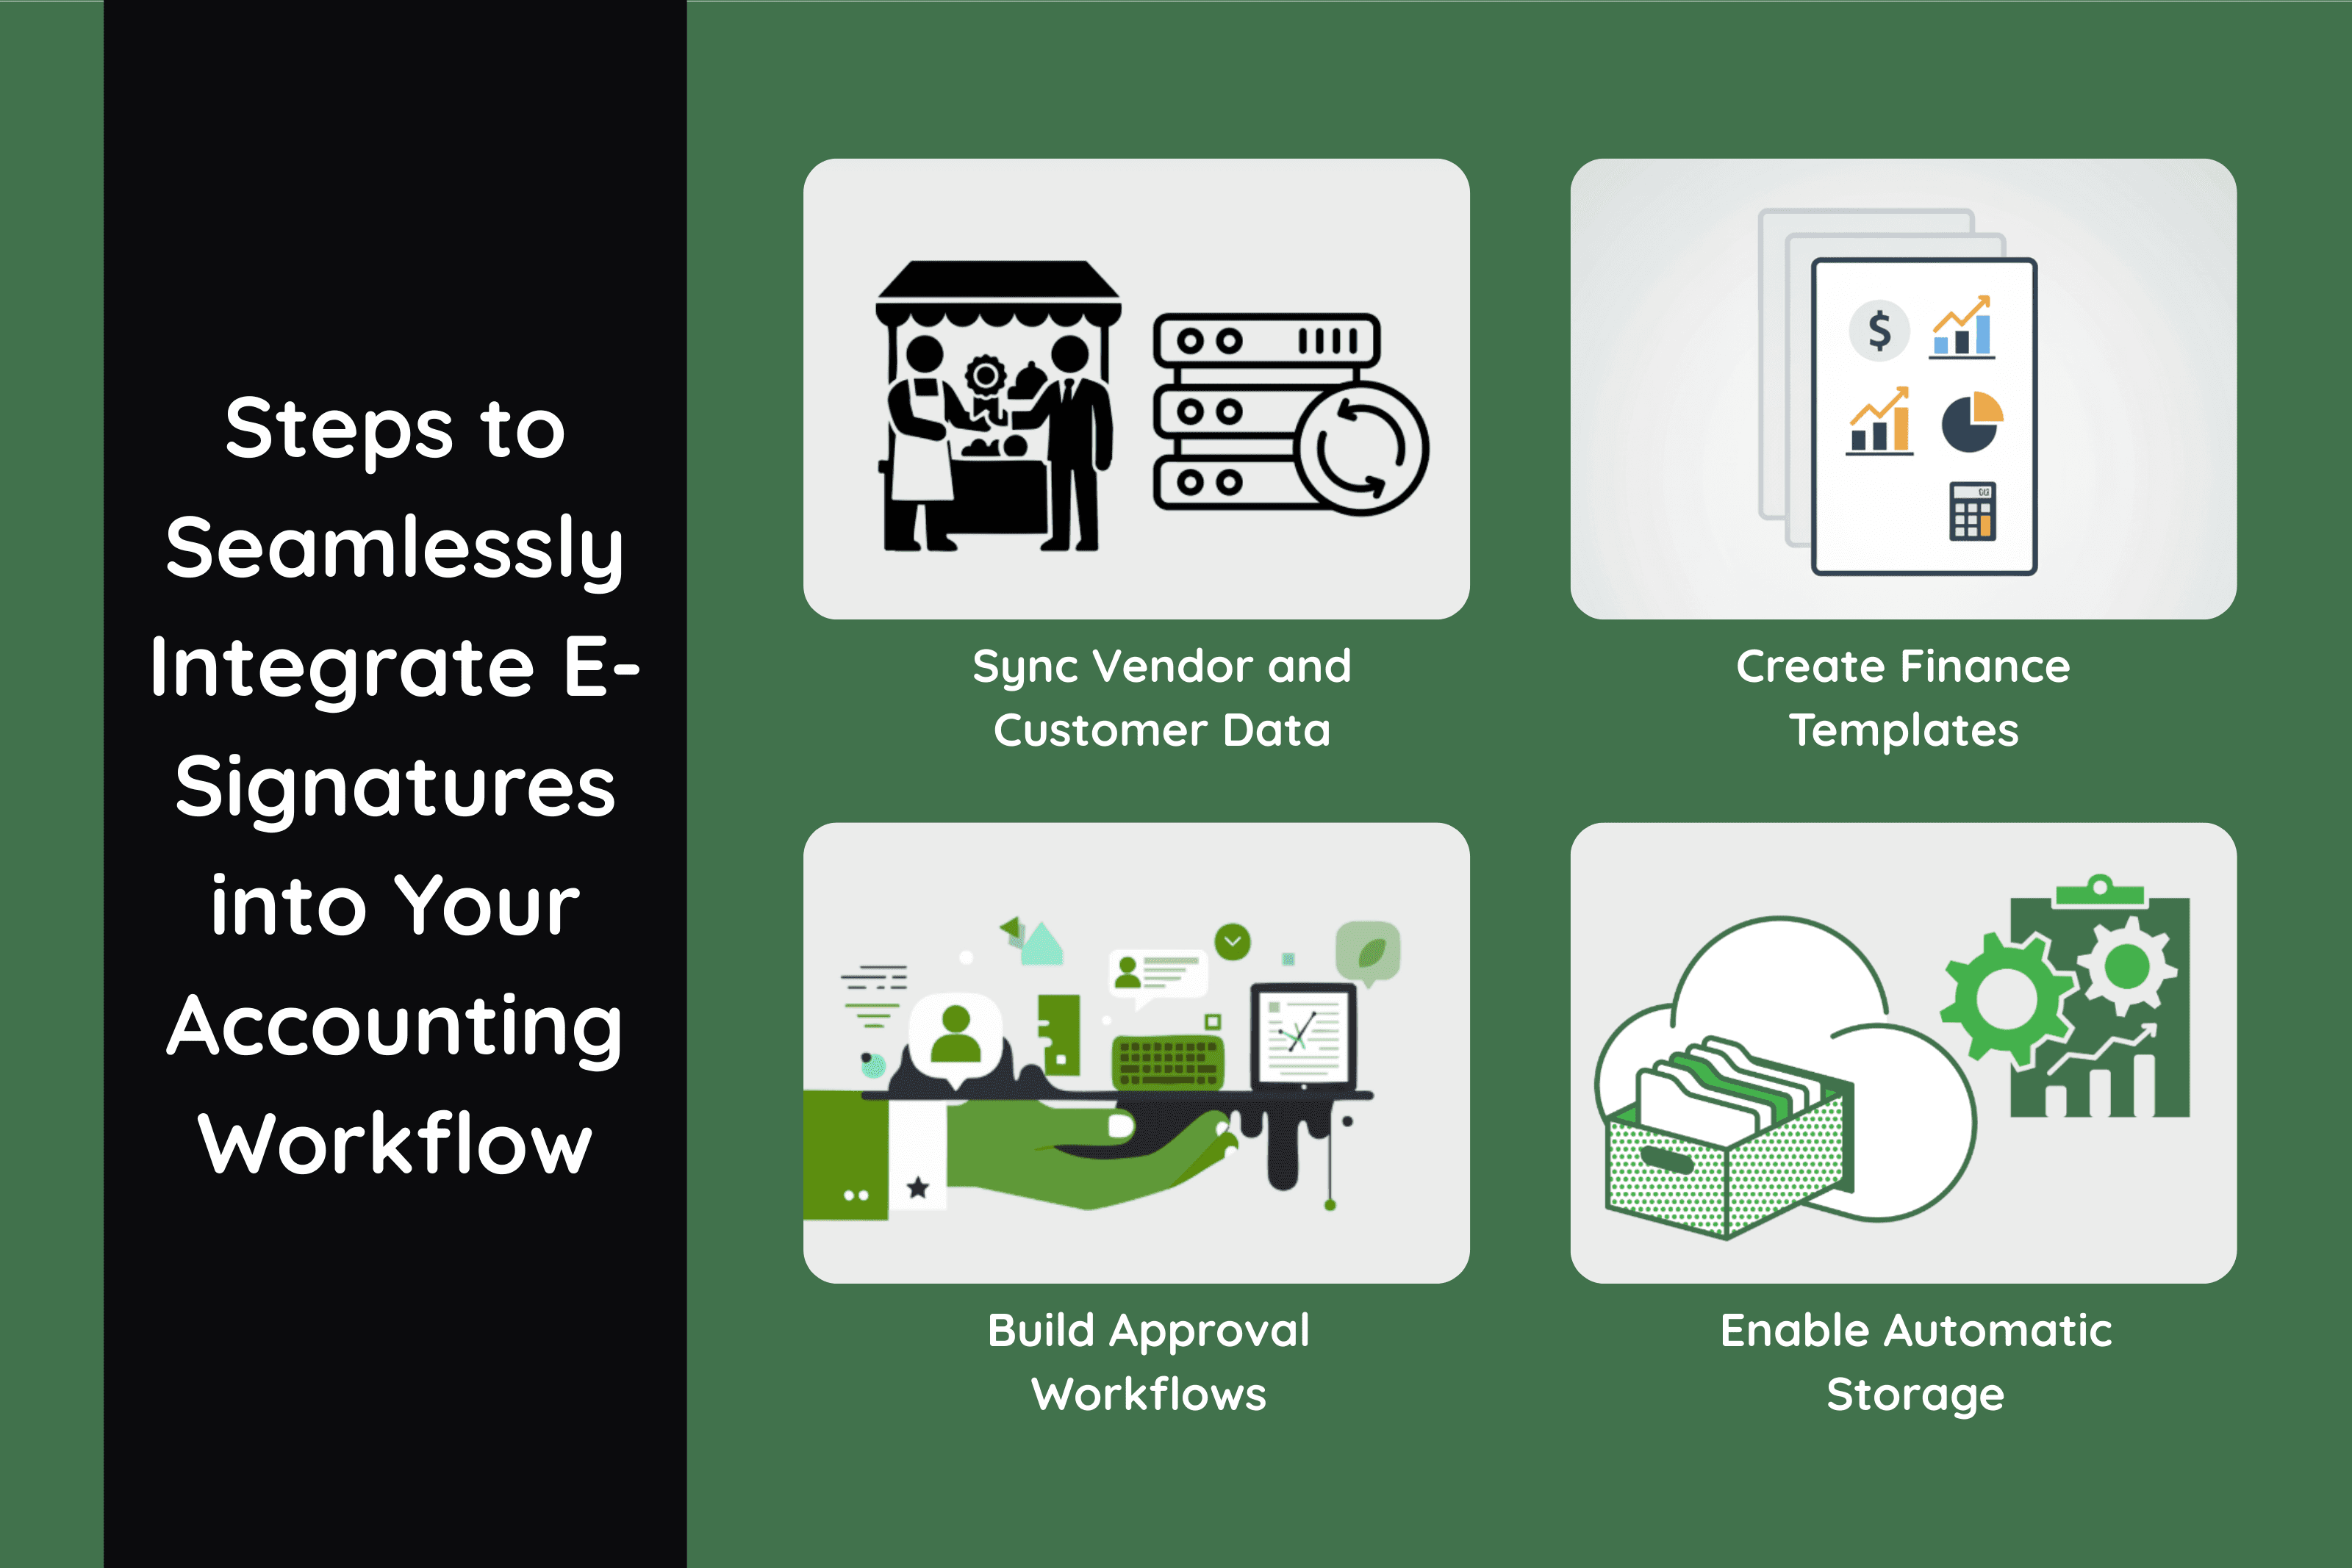
Step-by-Step: How to Integrate E-Signatures with Accounting Tools
Integrating your e-signature platform with your accounting system creates a reliable and efficient workflow for approvals, billing, and document storage. The steps below help you build a connected process that supports accuracy and faster decision-making.
Step 1. Sync Vendor and Customer Data
Your accounting system holds essential information about vendors and customers. Syncing this data with your e-signature tool ensures that every financial document is populated with the correct details.
Fields to import include:
Vendor names
Billing details
Tax information
Payment terms
This connection keeps information consistent across all documents and reduces the need for manual entry.
Step 2. Create Finance Templates
Templates allow your finance team to generate consistent documents quickly and accurately. Once connected to your e-signature platform, these templates can be filled and routed automatically during financial workflows.
Examples include:
Purchase orders
Invoices
Contractor agreements
Payment authorization forms
Organizing these templates ensures your team always uses approved and up-to-date versions.
Step 3. Build Approval Workflows
Financial documents often require multiple levels of approval. Defining clear workflows ensures that each document moves through the correct sequence without delay.
Define approval flows for:
Department heads
Finance approvers
Minimum approval thresholds
Automated routing ensures that documents reach the right decision makers and that approvals occur in the correct order.
Step 4. Enable Automatic Storage
Once documents are signed, they must be stored in the correct location for future reference, audits, and internal reviews. Enabling automatic storage ensures nothing gets lost.
Store signed documents in:
Your accounting system
Cloud storage folders
This creates a complete and organized record for every vendor, customer, or financial transaction.
Popular Accounting Platforms That Integrate with E-Signatures
Many accounting platforms offer built-in support for e-signature integrations, making it easier for finance teams to manage approvals, billing, and document storage in one place. Popular options such as QuickBooks, Xero, Sage, NetSuite, FreshBooks, and Wave allow users to generate financial documents, collect signatures, and sync completed files directly into customer or vendor records. These integrations help maintain accurate financial data, streamline approval workflows, and ensure all signed documents remain organized and audit ready.
How to Prepare Before Integrating Any Tools
Before connecting your e-signature software to your CRM, HR platform, or accounting system, it is important to strengthen your internal processes. A well-structured foundation ensures that your integrations perform smoothly and support your team without creating new bottlenecks.
1. Audit Existing Workflows
Reviewing your current workflows helps you understand how documents move through your organization and where the main obstacles appear. Focus on areas such as:
Bottlenecks
Approval delays
Redundant steps
Manual tasks
Identifying these issues early allows you to design integrations that eliminate friction rather than replicate existing problems.
2. Standardize Your Template Library
A clean and consistent template library ensures that every document generated through your integrations is accurate and compliant. Create and organize templates for:
Sales agreements
NDAs
HR forms
Financial approvals
Standardization reduces confusion, minimizes version errors, and ensures that all teams work from the same approved documents.
3. Map Your End-to-End Process
Before enabling automation, define how each document should flow from creation to completion. For every document type, clarify:
Who signs
What triggers the workflow
What happens after the signature
This mapping gives you a clear blueprint for building reliable automation and helps prevent gaps in routing or follow-up.
4. Set Security and Access Controls
Proper access control ensures that documents remain secure and only the right people can create, edit, or manage them. Decide who can:
Create documents
Edit templates
Access signed files
View audit trails
Setting these permissions early protects sensitive information and keeps your integration aligned with compliance requirements.
Universal Steps for Integrating E-Signatures With ANY Tool

Although every platform is different, most e-signature integrations follow a similar structure. These universal steps help you connect your systems in a clean and reliable way, whether you are integrating with a CRM, HR system, accounting platform, or any other business tool.
Step 1. Choose the Integration Method
Decide how you want your systems to communicate. Your choice determines how much flexibility you have and how deeply the tools can sync.
Options include:
Built-in connector
API
Zapier, Make, or custom automation
Built-in connectors are the fastest to set up, while APIs and automation platforms offer more advanced customization.
Step 2. Connect Your Accounts
Once you have chosen the integration method, link your accounts so data can move between platforms.
This usually includes:
API keys
Authentication approvals
Completing these steps allows your e-signature platform to interact with your other systems securely and consistently.
Step 3. Configure Triggers and Actions
Triggers determine when a workflow begins, while actions define what happens next. Setting these rules allows your integration to run automatically without manual involvement.
Common examples include:
Contract sent
Contract viewed
Contract completed
Contract expired
Each event can trigger follow-up tasks, notifications, pipeline updates, or additional document steps.
Step 4. Automate Follow-Ups
Use event-based reminders to keep processes moving. Automated follow-ups prevent documents from sitting idle and ensure that signers receive timely prompts. Reminders can target internal team members, clients, vendors, or employees depending on the workflow.
Step 5. Test the Workflow
Testing ensures your integration performs correctly under real conditions. Check every part of the process before launching it to your full team.
Confirm the following:
Field accuracy
Document routing
File storage
Notifications
This test run helps you catch errors early and confirm that every step behaves as expected.
Step 6. Optimize and Maintain
As your business grows, your workflows and document needs will evolve. Review your integrations regularly to ensure they still support your processes. Update templates, adjust triggers, and refine routing rules to keep everything running smoothly.
Advanced Integration Strategies
Once your basic e-signature integrations are in place, you can enhance your workflows even further with advanced strategies. These approaches help your systems communicate more intelligently, support complex document journeys, and give your team real-time visibility across every stage of the process.
Bidirectional Sync
Bidirectional sync creates a two-way data flow between your e-signature platform and your connected systems. Information updates automatically in both places, ensuring that fields, document statuses, and records remain consistent. This prevents duplicate data entry, keeps every department aligned, and reduces the risk of discrepancies in customer, employee, or vendor information.
Multi App Workflow Chains
Some organizations rely on several tools to complete a full document process. Multi app workflow chains allow you to connect systems in a sequence so each step triggers the next.
For example: CRM to e-signature to accounting to file storage
This type of chain ensures that new agreements move seamlessly through sales, finance, and operations, with each system completing its part automatically.
Document Lifecycle Automation
Document automation does not end with the signature. A fully integrated workflow supports the entire lifecycle of every document.
Pre signature routing - Documents are sent to the correct people in the right order based on predefined rules.
Post signature storage and alerts - Completed files are automatically saved in the correct system, and team members receive instant notifications.
Expiry and renewal reminders - Systems monitor renewal dates and send reminders or generate new agreements before contracts expire.
Lifecycle automation keeps documents organized from creation to completion and ensures nothing is forgotten along the way.
Webhook Based Notifications
Webhooks provide real-time alerts whenever an important event occurs such as a document being opened, signed, or rejected. These notifications can appear in Slack, Teams, dashboards, or internal systems so your team is informed instantly. This creates faster responses, clearer visibility, and better coordination across departments.
Troubleshooting Common Integration Problems
Even well designed integrations can encounter issues, especially as your systems grow and become more interconnected. Identifying the most common problems helps you resolve them quickly and keep your workflows running smoothly.
Authentication token errors - When authentication tokens expire or lose access, your integration may stop syncing without warning. Reauthenticating your accounts restores the connection and prevents workflow interruptions.
Incorrect user roles - If users do not have permission to send, sign, or manage documents, they may encounter errors or be unable to access templates. Reviewing and updating role assignments ensures that every team member has the correct level of access.
Fields not mapping properly - Incorrect or outdated field mapping causes documents to generate with missing or inaccurate information. Confirming that each field in your template matches a valid field in your connected system resolves this issue.
Missing webhook permissions - Webhooks are responsible for sending real-time updates between systems. If permissions are missing or disabled, your tools will not receive important status changes. Verifying webhook access ensures instant notifications and accurate tracking.
Duplicate data from improper sync settings - Incorrect sync rules may create duplicate records in your CRM, HR system, or accounting platform. Reviewing your sync configuration and standardizing field names prevents duplication and keeps your data clean.
Best Practices for Smooth, Scalable Integrations
Following proven best practices helps your integrations remain stable as your organization grows. Strong foundations lead to cleaner data, better performance, and fewer issues over time.
Maintain clean data in all systems - Accurate and consistent data ensures that documents generate correctly and workflows run without errors. Regular cleanups help prevent issues caused by outdated or inconsistent records.
Standardize naming conventions - Using consistent names for templates, fields, and folders makes it easier for teams to find what they need and reduces confusion during setup and daily use.
Create template governance rules - Establish guidelines for who can create, edit, and approve templates. This ensures version control and prevents unauthorized changes that could disrupt workflows.
Use sandbox or test mode - Testing your integrations in a non production environment helps identify issues before they affect real documents or customer data.
Audit workflows regularly - As your business evolves, your workflows should evolve with it. Periodic reviews help you identify outdated processes, optimize triggers, and maintain a reliable system that supports your team.
Strengthening Your Operations Through E-Signature Integration

Integrating your e-signature software with your CRM, HR platform, and accounting tools creates a faster and more organized workflow across every department. Connected systems reduce manual tasks, improve accuracy, and give teams a clearer view of every agreement from creation to completion.
At ROGER, as a Modern Electronic Signature Software, we help teams build these seamless connections by supporting smooth integrations, reliable verification, and automated workflows that keep documents moving without unnecessary steps. Businesses that streamline their CRM, HR, and finance processes early benefit from stronger operational efficiency and clearer compliance as more transactions shift to fully digital experiences.
If you are a startup, small business, or growing team and want a simpler and more efficient way to integrate e-signatures into your daily tools, book a call with us to explore how ROGER can strengthen your operations.